

Plan the central aisle before choosing cabinet finishes
The empty floor in the middle is the working heart of a U-shaped kitchen. Draw every appliance, drawer and door in its open position before ordering cabinetry. The dishwasher should not trap someone at the sink, and an oven door should not block the only route out. Then assign each run a main role: preparation, cooking or washing. Tall storage works best near an end rather than interrupting the central work surface, while the brightest uninterrupted counter should handle the task you perform most often.
Use a wide window as the visual fourth wall
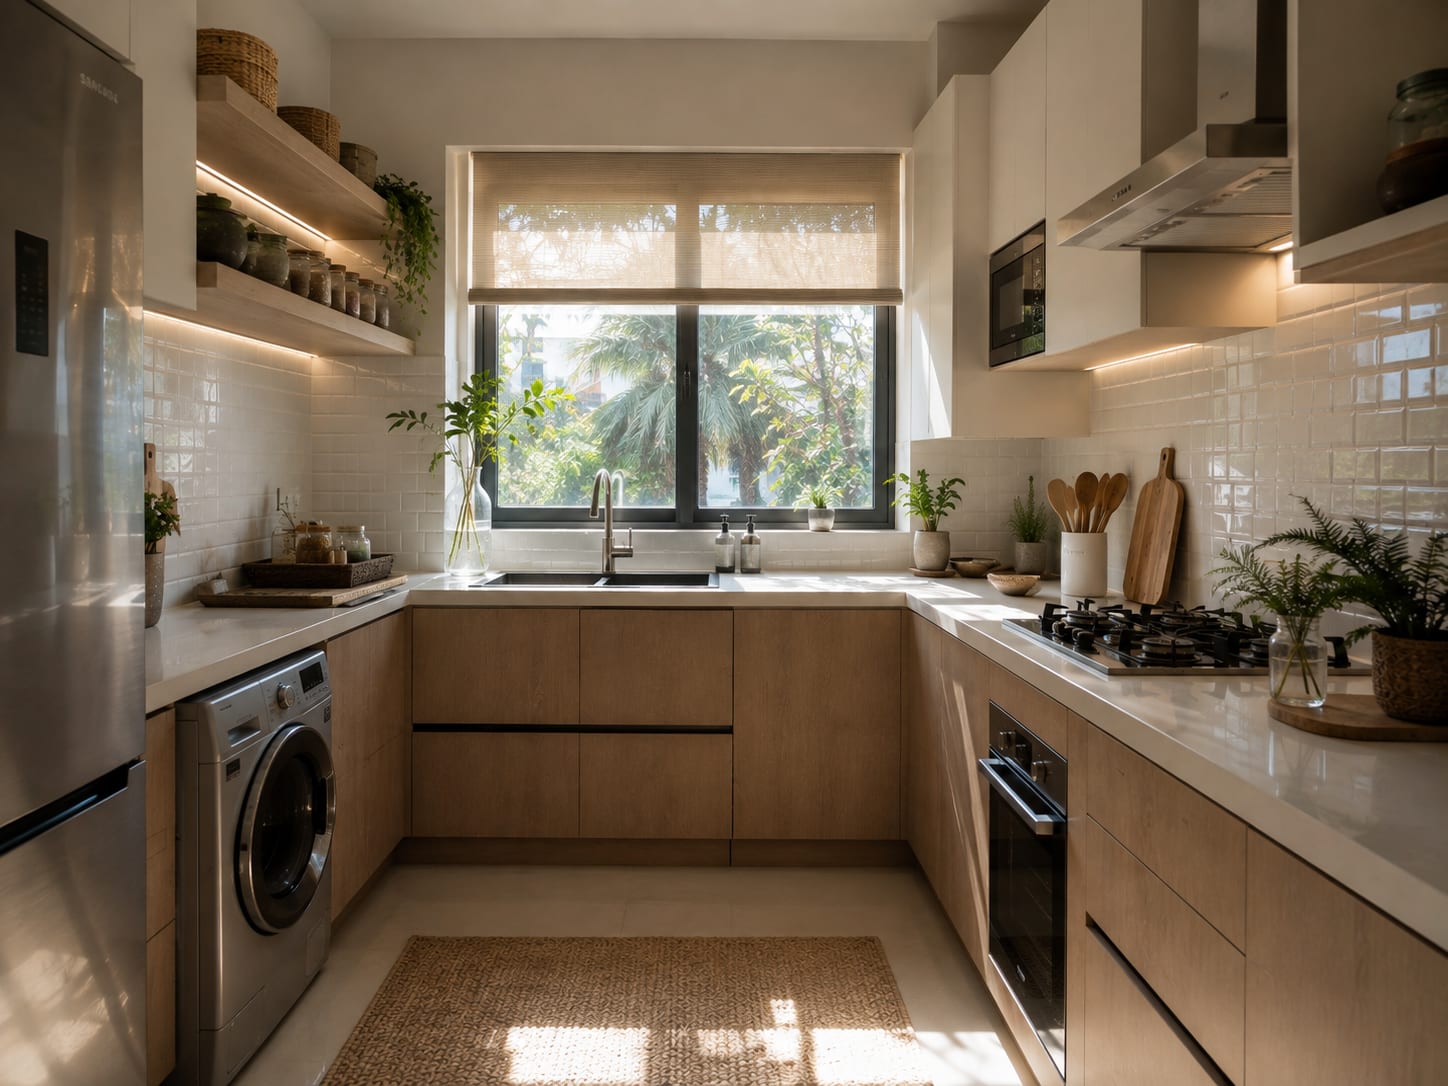
The window does most of the visual work in this kitchen. Keeping the sink run free of upper cabinets allows daylight to reach all three work surfaces, while pale oak fronts and a glossy white tile return that light into the room. The refrigerator and laundry appliance occupy the left side, so their door swings need to be checked carefully before copying the plan. What to borrow is the hierarchy: tall utility pieces at the entrance, the washing zone beneath the view and the cooking run kept visually simple.
Balance glossy dark storage with a bright working centre
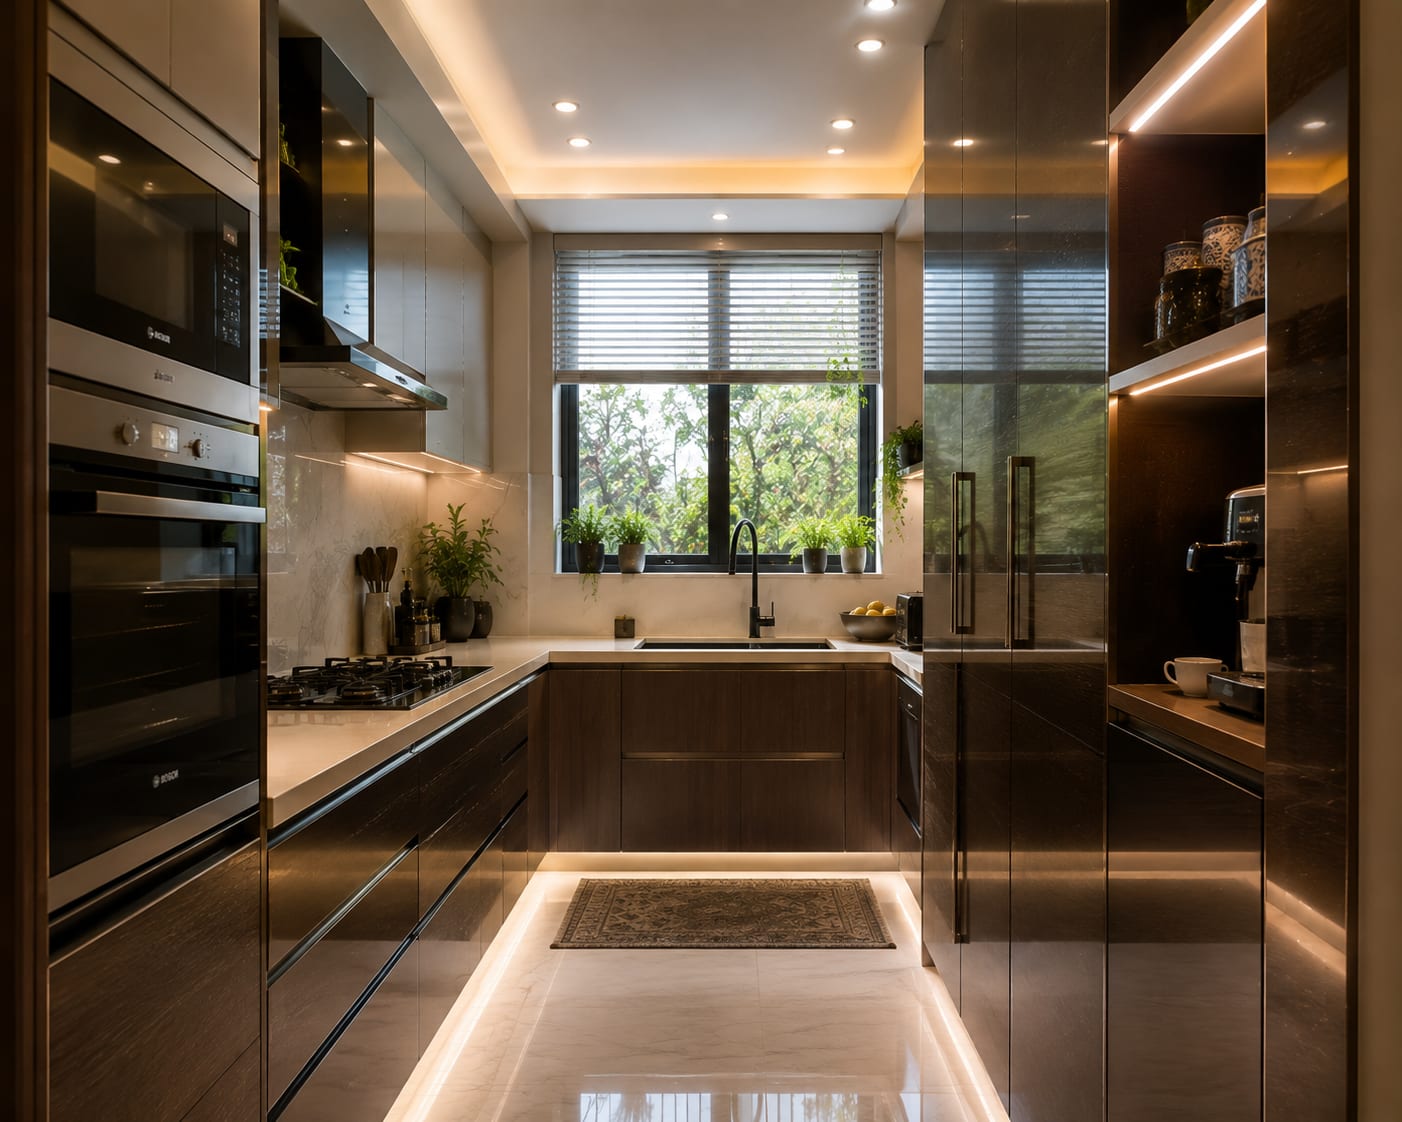
Dark full-height cabinets can make a narrow kitchen feel tight, so this version concentrates their visual weight on the side walls and leaves the window as a bright destination. Pale worktops and flooring form a continuous light plane through the centre. The coffee station is useful because it keeps a daily ritual away from the main preparation run, but open niches only work when their sockets, steam and cleaning needs are planned. Use gloss selectively; reflections add depth, yet fingerprints become more visible at hand level.
Choose warm oak and one long shelf for a softer kitchen
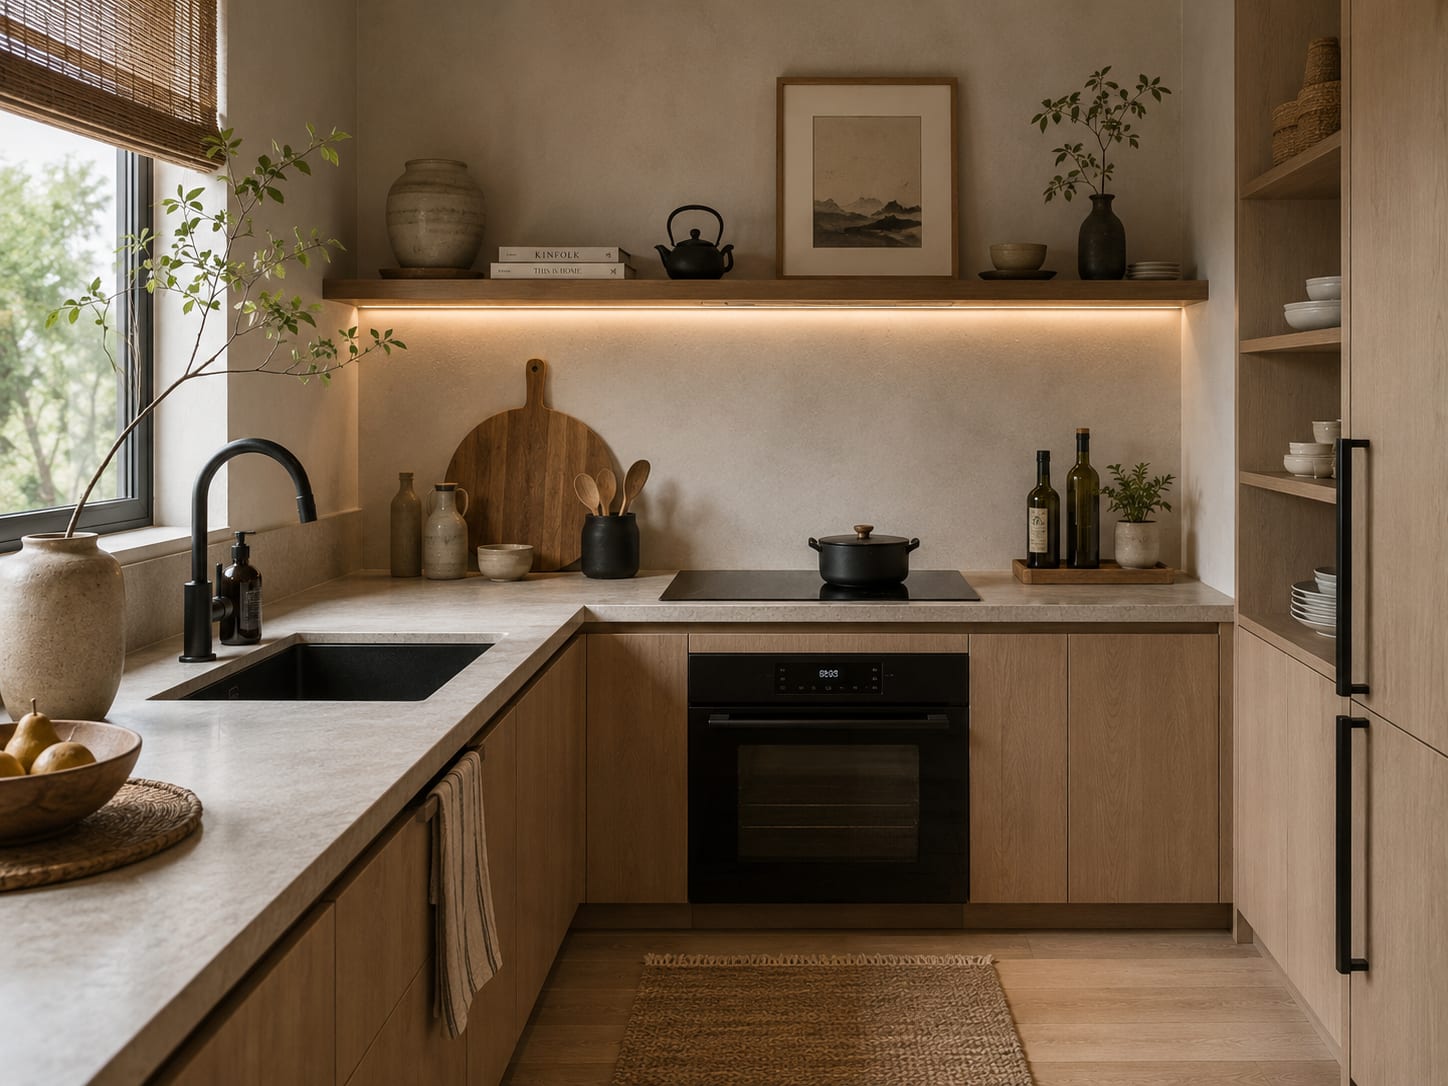
This is the quietest scheme in the collection. Flat oak fronts allow the grain to become the decoration, while one long shelf replaces a heavy row of upper cabinets. The result feels open, but it also reduces concealed storage, so reserve the shelf for objects used or cleaned regularly. The sink and hob sit on different runs with landing space beside each, and the black fittings provide enough contrast without fragmenting the palette. A similar effect can be achieved with a durable oak-look veneer rather than solid timber.
Let black Shaker cabinets frame the daylight
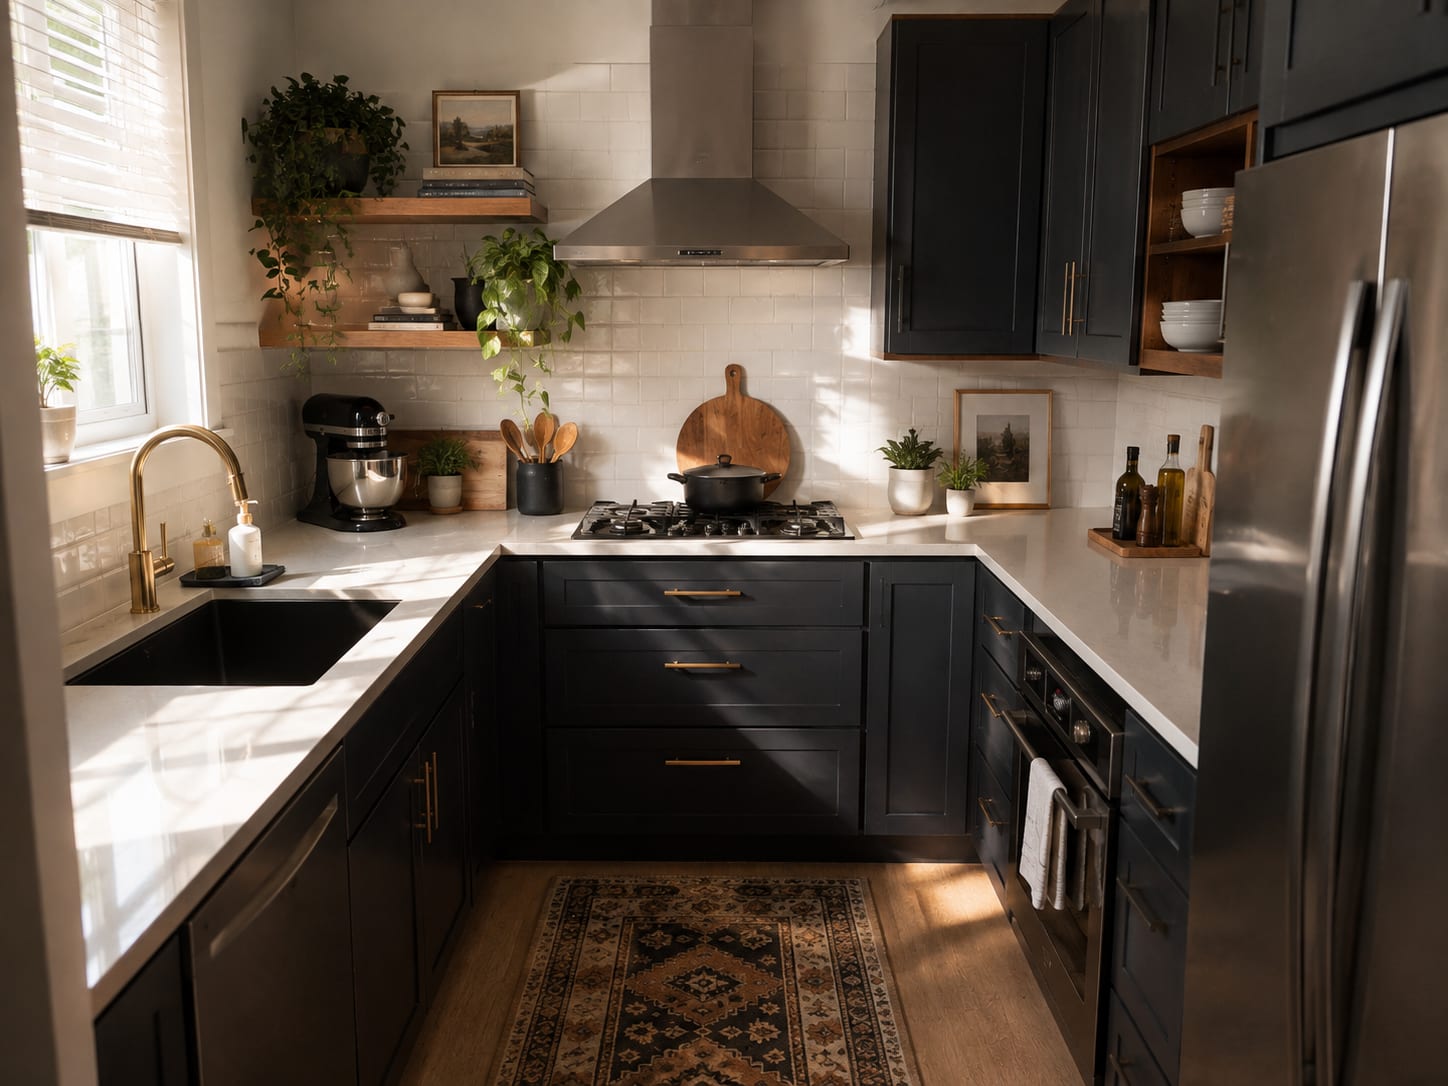
Black cabinetry succeeds here because it frames several lighter elements: a white tiled wall, pale worktops, a sunlit window and warm timber shelves. The upper cabinets are concentrated to the right, preventing all three sides from closing in. Brass is repeated only in the tap and handles, which is enough to warm the contrast. Plants soften the harder lines, but they should not obstruct ventilation or the main preparation zone. If natural light is weaker in your room, use charcoal or very deep grey instead of absolute black.
Use a restrained two-tone scheme to organise the elevations
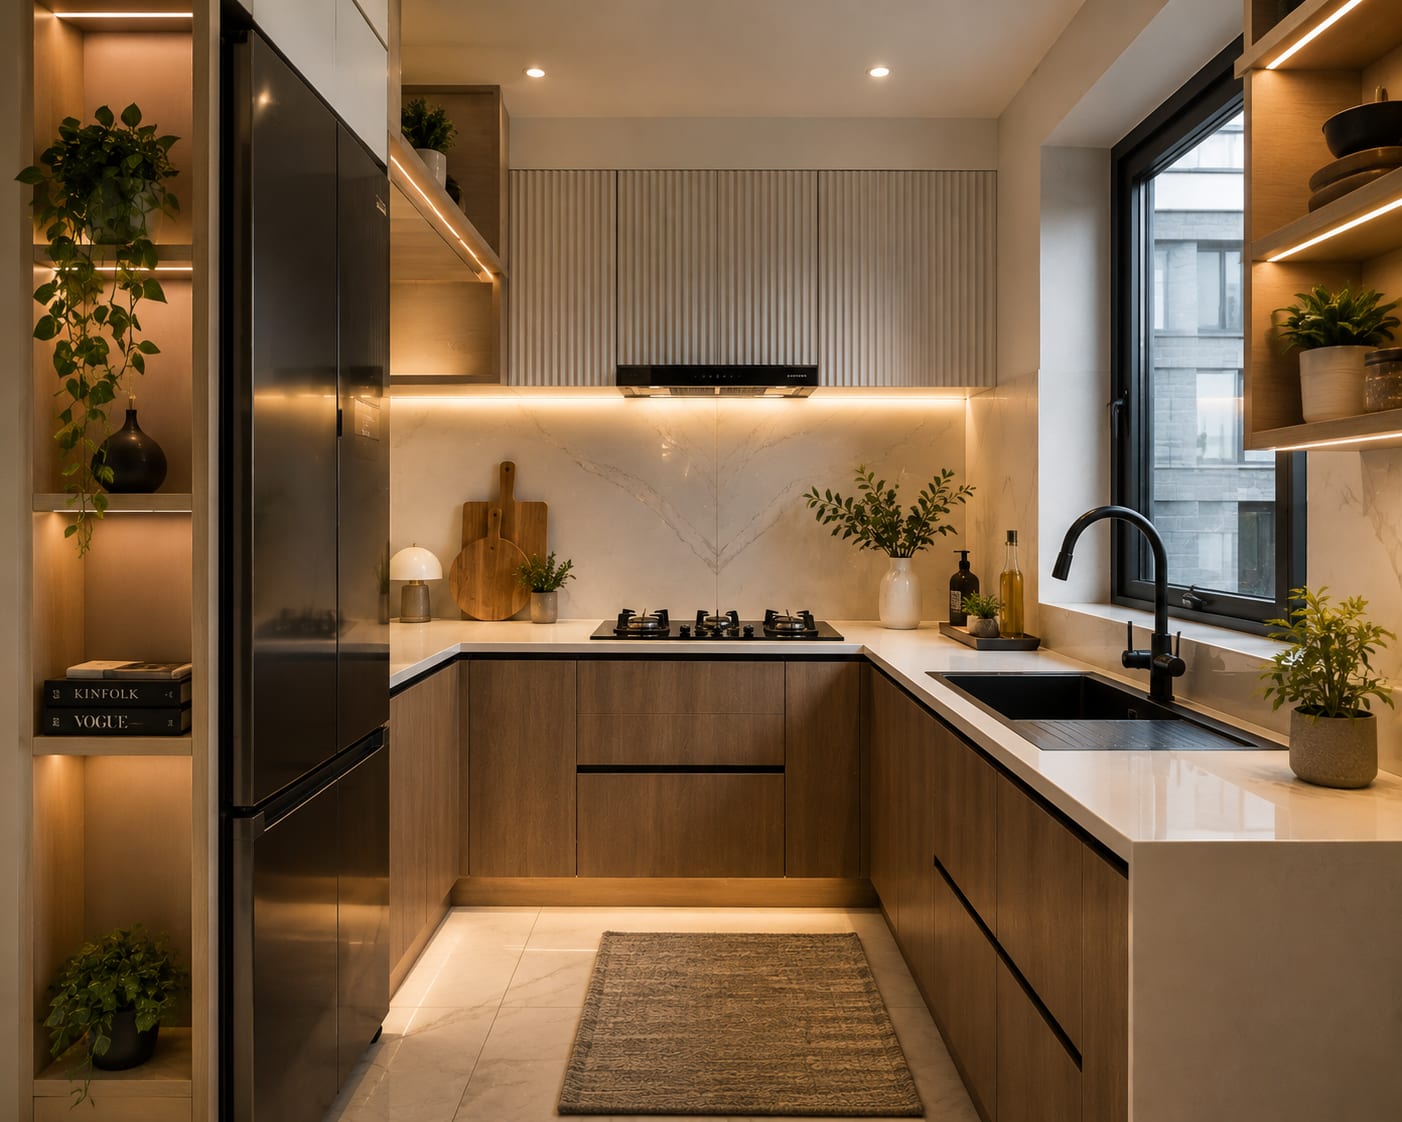
Rather than alternating colours on every door, this kitchen gives each finish a job. Warm timber grounds the base units, dark panels define the refrigerator and tall storage, and pale ribbed uppers blend into the ceiling. The marble backsplash creates a calm centre behind the hob. This zoning is easier to read than a scattered two-tone pattern and can make standard cabinetry feel more considered. Keep under-cabinet light continuous across the working run so the material change does not create dark gaps on the counter.
Pair dark wood bases with reflective upper cabinets
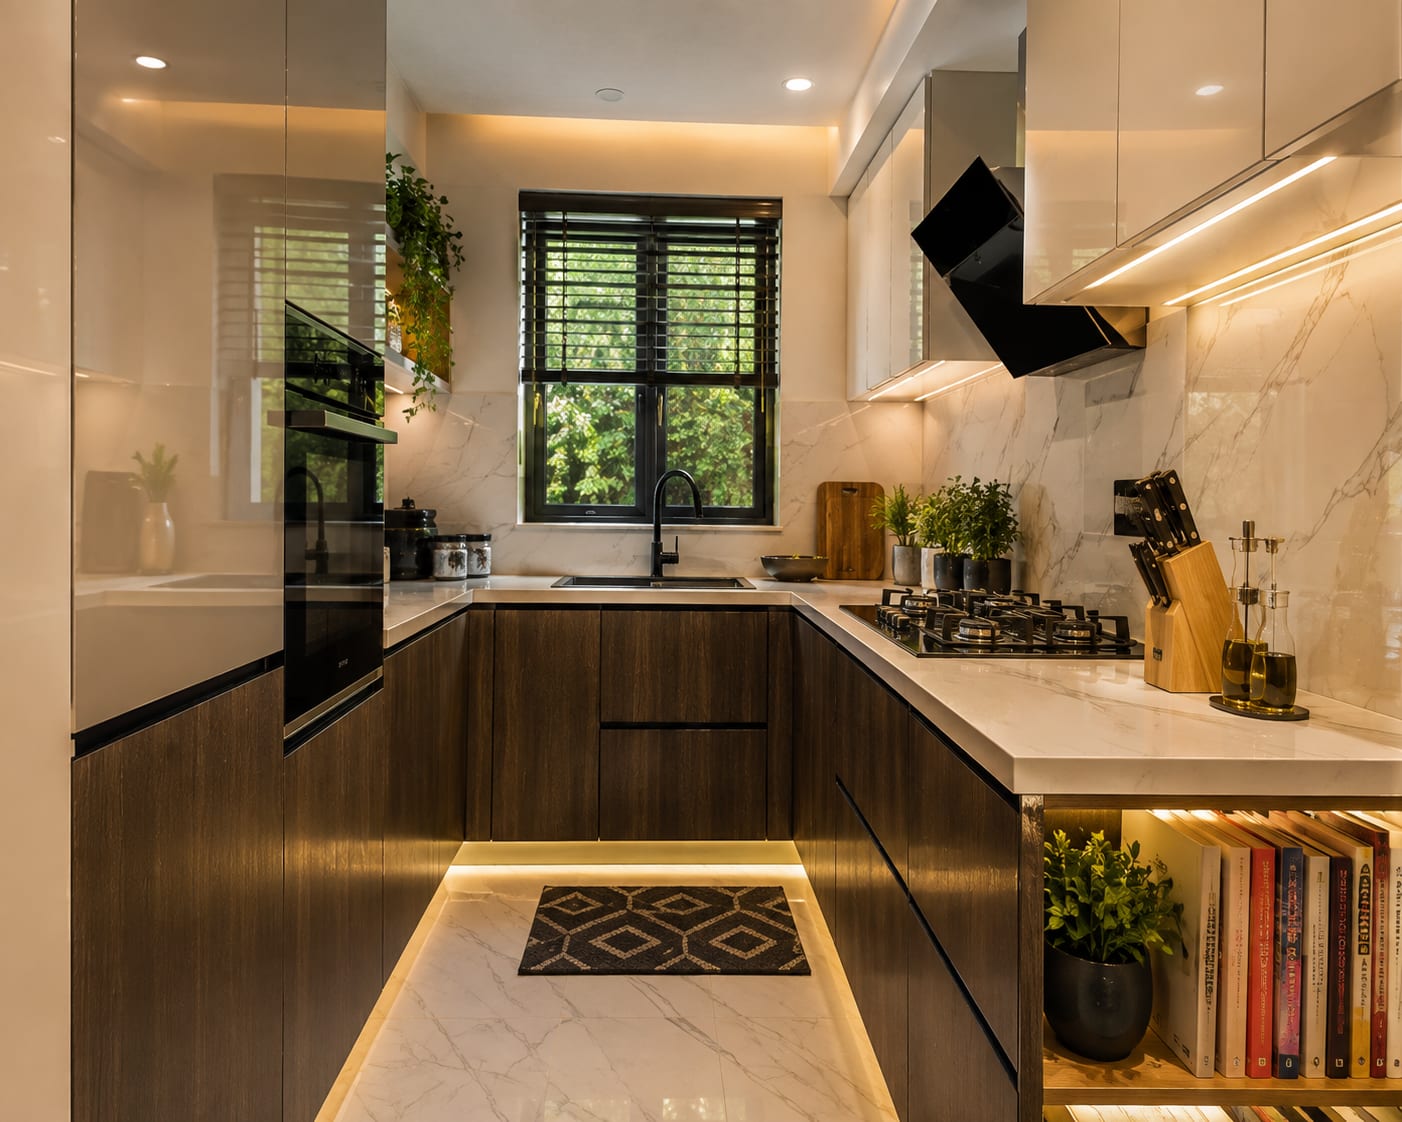
Putting the darker finish below eye level makes this kitchen feel grounded, while reflective pale uppers merge with the backsplash and ceiling. A small open shelf at the end turns an awkward return into accessible storage without adding another solid door. The lighting is effective because it falls on the worktops and toe-kick rather than relying only on ceiling spots. In a real scheme, keep low-level lighting subtle and independently controlled; it should guide movement at night, not outline every cabinet like a display set.
Six practical rules for a compact U-shaped layout
- Draw appliance and cabinet doors open to identify collisions before fixing the plan.
- Keep the most-used preparation surface well lit and free from countertop appliances.
- Use corner storage only when its mechanism genuinely improves access; simple shelves can sometimes hold more.
- Concentrate tall cabinets near an end so they do not split the working counter into small pieces.
- Give at least one wall visual relief through a window, open shelf, pale finish or fewer upper cabinets.
- Repeat a small material palette across all three sides so the layout feels continuous rather than crowded.
Join the conversation
Share your thoughts on this room